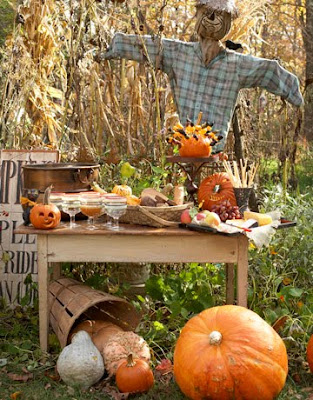
Today, scarecrows are also used as a decorative item that appear mostly in the fall. Halloween scarecrows are quite common, but you can also set up a pretty fall display with a scarecrow or two and a few bales of hay or straw.
Making a scarecrow is quite simple, and a lot of fun for the whole family. Definitely get the kids involved and make it a group project. For something really fun, let each family member create their own scarecrow in their image, and then display your scarecrow family prominently in front of your house.
You don't have to use traditional outfits for your scarecrows. They can be dressed in old suits or formal wear, or even dressed up in costumes! Make both male and female scarecrows if you'd like. Hang them up on bamboo stakes, or arrange them on your lawn furniture, on hay bales, or even your front steps. Use your imagination to make your scarecrow a truly individual craft.
For each scarecrow, you'll need:
•two bamboo poles, one 4-feet long and another 6-feet long (for stake, if using)
•twine
•florist wire
•safety pins
•glue
•long-sleeved shirt
•long pants or overalls (jeans are commonly used)
•socks or boots
•gloves (either winter gloves or work gloves can be used)
•yarn or straw for hair, if desired
•hat
•pillowcase (without a pattern)
•waterproof paint and paintbrushes
•old newspaper, pillow stuffing, or straw to stuff clothing
•accessories, such as bandanas, costume jewelry, or glasses (optional)
Place the 4-foot bamboo pole across the longer pole, about one and a half feet down from the top. Secure in place by wrapping the cross point with twine and tying tightly. Set aside.
Paint the scarecrow's face onto the pillowcase. Besides paint, you can add glitter, makeup, felt or fabric cutouts, or use magic markers to add detail and decoration. Set pillowcase aside to allow the paint to dry completely.
Using twine, tie off the ends of the shirt sleeves and the cuffs of the pants. Using your choice of stuffing, stuff the shirt and pants. Likewise, stuff the gloves and socks and tie off the ends securely. Attach the gloves and socks to the sleeves and pant legs with safety pins or florist wire, or tie them on with twine. If you're using boots, attach them to the socks or pant legs with shoelaces or pins.
When the paint on the pillowcase head is dry, stuff the pillowcase and firmly tie off the end of the case with twine, leaving at least a couple of inches of fabric hanging down. Attach the head to the top of the shirt with wire or safety pins, tucking the ends of the pillowcase inside the shirt to prevent stuffing from escaping.
Using glue or wire, attach yarn or loose straw to the top of the scarecrow's head for hair. Place the hat on top and secure firmly with safety pins. Make sure the hat won't blow off the scarecrow if the weather turns windy.
Add extra touches like a bandana tied around the neck, or a pair of sunglasses tied on. Use glue, twine, or florist wire where necessary to secure loose adornments.
If you're using a stake, firmly press the bottom end of the bamboo stake into the ground, deep enough so that it won't blow over. Tie the scarecrow to the stake at the neck and waist with twine. Use florist wire to secure the scarecrow to the bamboo if necessary. Stretch the arms out along the shorter length of bamboo and tie the wrists to the pole with twine.
Alternatively, arrange your scarecrow in a lawn chair, bales of hay, or anywhere you'd like to place him (or her!). At the end of the season, store your scarecrow in a dry place in your home to use again and again.
Tip: If you're not hanging your scarecrow on a stake, you can use a hollowed-out, carved or painted pumpkin as the head.


No comments:
Post a Comment